SMB(Server Message Block)
SMB(Server Message Block)通信协议是微软(Microsoft)和英特尔(Intel)在1987年制定的协议,主要是作为Microsoft网络的通讯协议。外文名Server Message Block简称SMB制定双方微软和英特尔(Intel)制定时间1987年,SMB是在会话层(session layer)和表示层(presentation layer)以及小部分应用层(application layer)的协议。SMB使用了NetBIOS的应用程序接口 (Application Program Interface,简称API)。另外,它是一个开放性的协议,允许了协议扩展——使得它变得更大而且复杂;大约有65个最上层的作业,而每个作业都超过120个函数,甚至Windows NT也没有全部支持到,最近微软又把 SMB 改名为 CIFS(Common Internet file System),并且加入了许多新的特色。
SMB协议是基于TCP-NETBIOS下的,一般端口使用为139,445.
相关详解:https://baike.baidu.com/item/smb/4750512?fr=ge_ala
一,安装部署
sudo apt-get install samba    # 安装samba
sudo apt-get install smbclient  # 安装smbclient 这里不涉及,可以不安装
sudo apt-get install cifs-utils # 安装smbf 这里不涉及,可以不安装- 修改配置文件。 修改前记得先备份,养成良好习惯
sudo cp /etc/samba/smb.conf /etc/samba/smb.conf.bak
vim /etc/samba/smb.conf
二,新建SMB共享目录
1.建立共享文件夹
mkdir -p /home/Back
2.设置权限
chmod 755 /home/Back
三,配置SMB相关参数
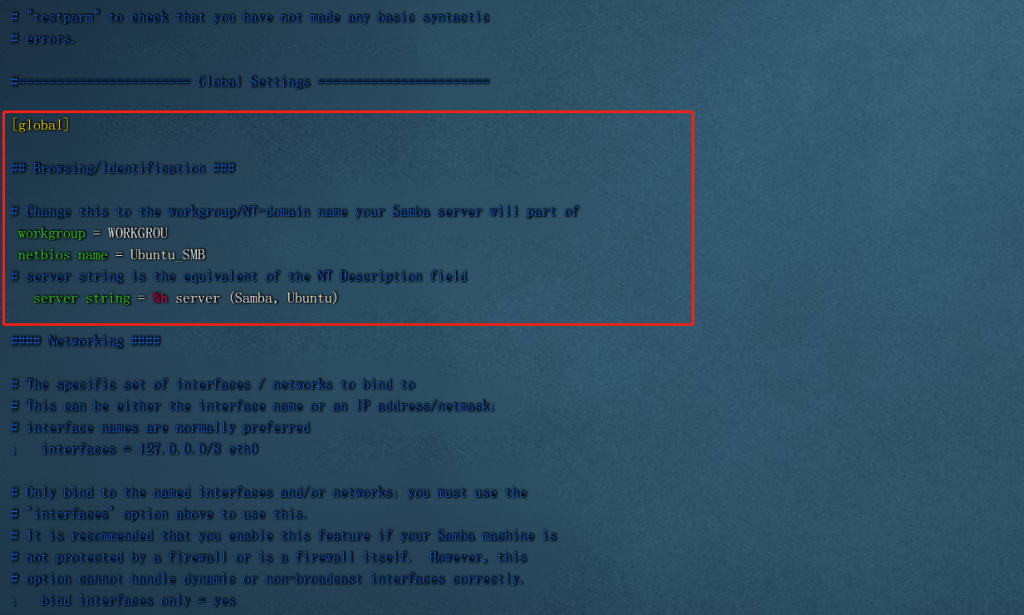
然后在配置文件末尾添加:netbios name = Ubuntu_SMB 必须放到[global] 下,网络邻居中显示的发现的设备名[Ubuntu_SMB]为共享的文件夹名称
#======================= Global Settings =======================

[global]

## Browsing/Identification ###

# Change this to the workgroup/NT-domain name your Samba server will part of
 workgroup = WORKGROU
 netbios name = Ubuntu_SMB
# [Ubuntu_SMB]
# server string is the equivalent of the NT Description field
   server string = %h server (Samba, Ubuntu)

#### Networking ####

# The specific set of interfaces / networks to bind to
# This can be either the interface name or an IP address/netmask;
# Uncomment to allow remote administration of Windows print drivers.
# You may need to replace 'lpadmin' with the name of the group your
# admin users are members of.
# Please note that you also need to set appropriate Unix permissions
# to the drivers directory for these users to have write rights in it
;   write list = root, @lpadmin
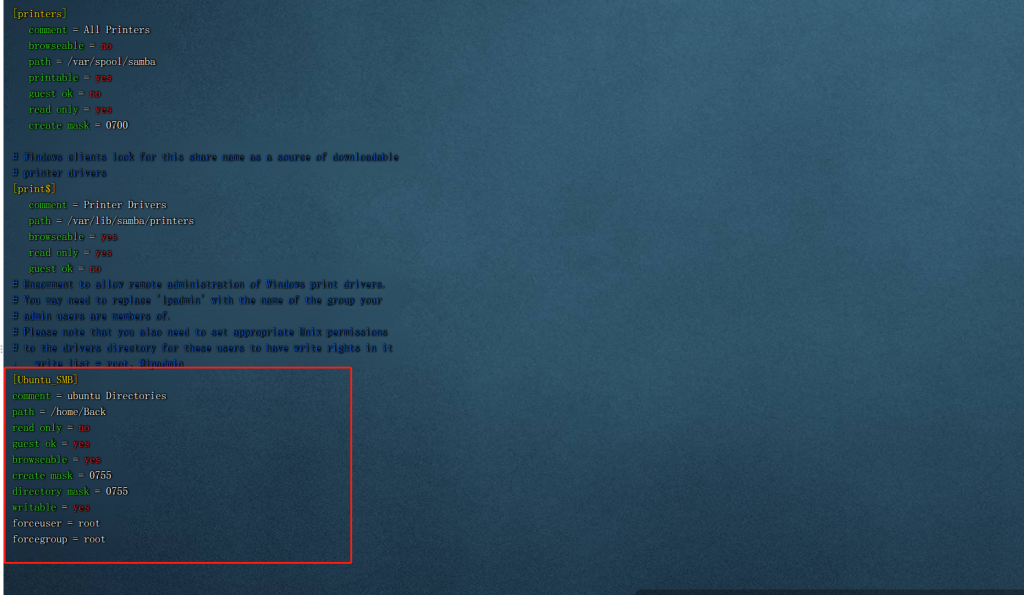
[Ubuntu_SMB]
comment = ubuntu Directories
path = /home/Back
read only = no
guest ok = yes
browseable = yes
create mask = 0755
directory mask = 0755
writable = yes
forceuser = root
forcegroup = root
- 配置完后检测配置信息
testparm防火墙处理(如果其他配置都正常,仅限于尝试此方式)
sudo ufw allow samba 四,添加Smb用户
sudo smbpasswd -a zxb五,访问Smb共享目录
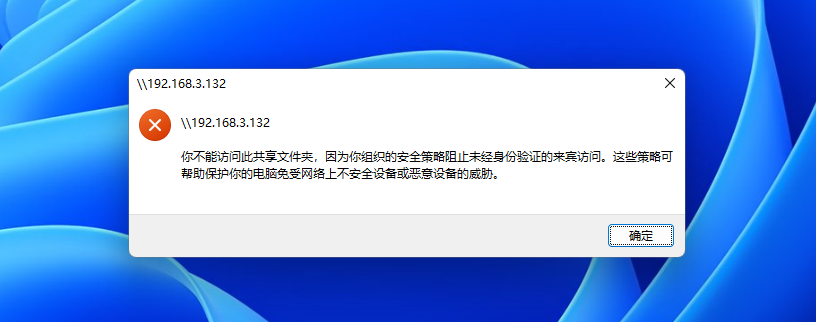
- 如何访问smb目录\\192.168.3.132提示如下:
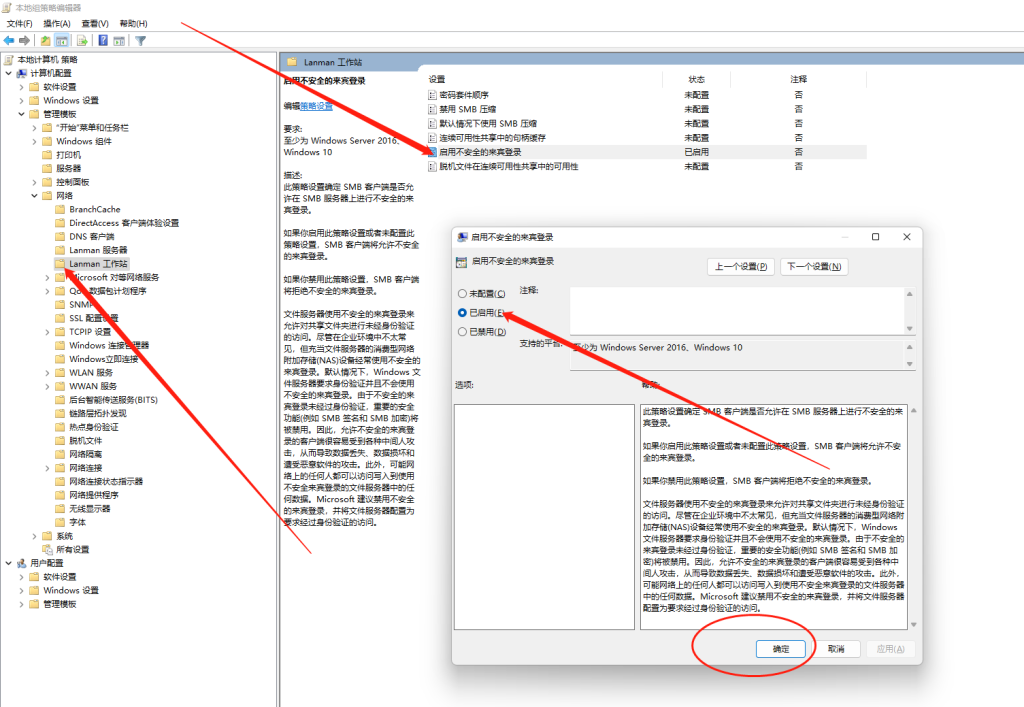
- 解决方案:修改组策略
- Win+R输入gpedit.msc(本地组策略编辑器)
- 计算机配置-管理模板-网络-Lanman工作站
- 找到策略设置中的启用不安全的来宾登录
- 将未配置修改为已启用
- 或者尝试如下:
- 直接在Win10上去访问Samba服务器会出现无法访问,因为组织的安全策略阻止未经身份验证的来宾访问
解决方案:添加凭据 - 开控制面板—>凭据管理器—>添加Windows凭据
- 直接在Win10上去访问Samba服务器会出现无法访问,因为组织的安全策略阻止未经身份验证的来宾访问
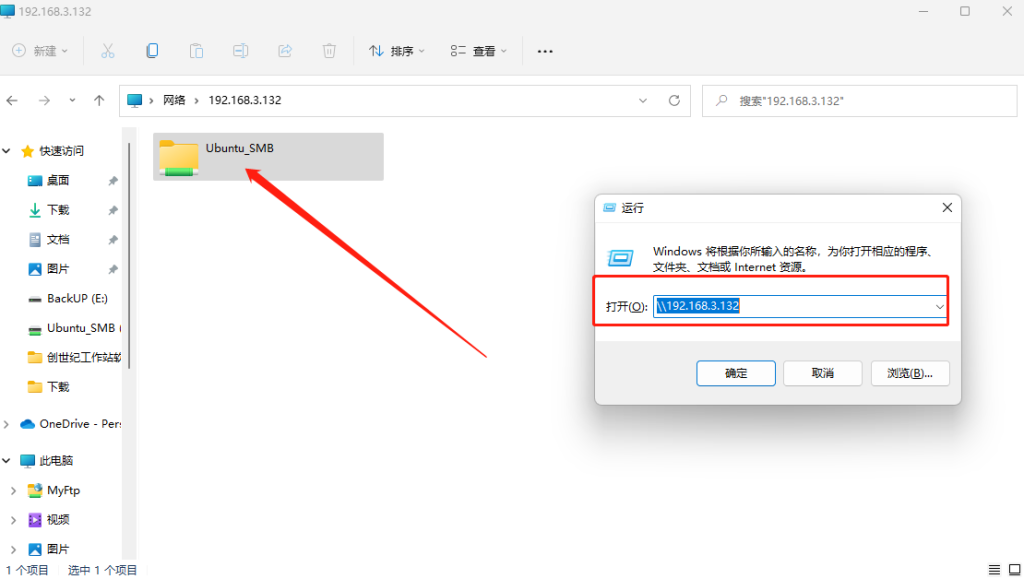
六,Samba测试
- 在Windows系统中按下Win + R
七,其它方式挂载
- mac访问
在finder(访达,文件管理器)中用快捷键 cmd + k 打开链接对话框输
输入smb://IP/username(部署了samba服务的机器的ip地址)
选择用户,并输入对应的用户名(smbuser)密码,可访问指定账户的目录- Linux访问ubuntu示例
sudo mount -t cifs //ip/username  local_dir -o user=username,passwd=xxx
# username是系统用户名
# local_dirs是挂载到本地的地址, 如/mnt
# user=xxx指的是当前的系统用户名
# passwd=xxx指的是用户配对的密码

# 解除挂载
sudo umount local_dir- 辅助命令
# 查看samba用户列表
pdbedit -L

# 对samba用户进行管理(用户已经在系统中创建)
smbpasswd -h  #查看支持的命令列表

# 异常时可查看日志情况
cat /var/log/samba/log.%mcentos7.9挂载远程Samba共享文件夹:https://www.hao0564.com/1785.html
参考文献:https://blog.csdn.net/w690333243/article/details/121449203
https://blog.csdn.net/dengjin20104042056/article/details/131747739
